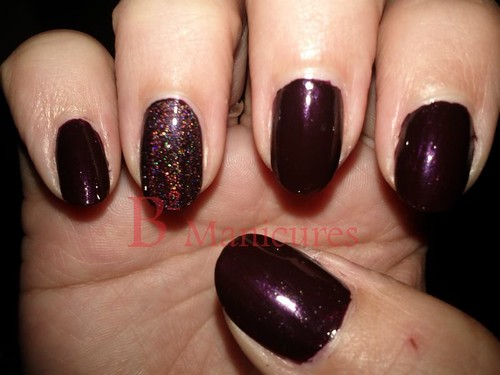
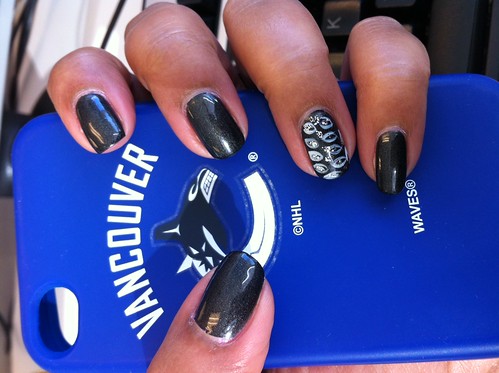
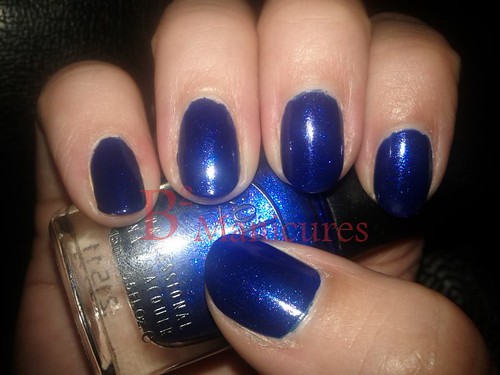
I wanted to do something with a glittery feature nail, so I went looking at my glitter polishes, and saw one I hadn't used yet. I paired it with a complimentary shade for the rest of my nails.
I started with two coats of OPI Cuckoo For This Color - this was a gift from a friend with great taste - haha! It is a shimmery dark teal. I guess you could describe it as an emerald green with a hint of blue. I don't even know what to say other than that; it's just really pretty.
On my ring finger, I applied a coat of Hard Candy Emerald Eve. Hard Candy polishes always surprise me - they are with glitter. This polish has tiny round emerald green glitter and larger round holographic gold glitter. I applied a thick-ish coat, and then remembered something else about Hard Candy polishes ... they dry fast!
I applied two coats of topcoat to the glittery nail just to help smooth out the texture.
Monday, November 25, 2013
Saturday, November 23, 2013
The Day of The Doctor
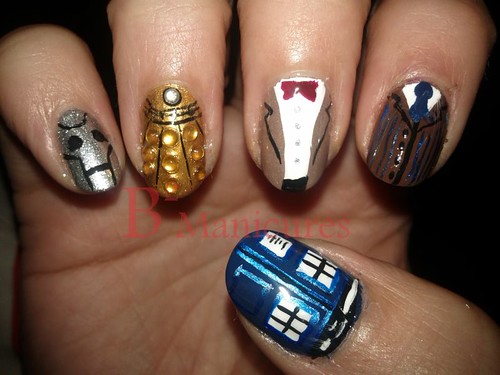
I've already established that I am a Doctor Who fan, so I have definitely been looking forward to today - the 50th anniversary of the show.
I figured I should do a manicure that would be appropriate for today.
I think I am most proud of my ring finger - it turned out pretty much exactly how I wanted.
The TARDIS on my thumb:
The 10th Doctor on my index finger:
The 11th Doctor on my middle finger:
A Dalek on my ring finger:
A Cyberman on my pinky:
Also ... I just finished watching the special. So. Good.
I figured I should do a manicure that would be appropriate for today.
I think I am most proud of my ring finger - it turned out pretty much exactly how I wanted.
The TARDIS on my thumb:
- China Glaze First Mate - for the base
- It's So Easy Stripe Rite Blue Metallic - for detailing
- It's So Easy Stripe Rite Black - for detailing
- Claire's White striping polish - for detailing
- Sinful Colors Snow Me White - for the windows and the door sign
The 10th Doctor on my index finger:
- Revlon Chocolate Truffle - for the jacket
- It's So Easy Stripe Rite Blue Metallic - for the pinstripes
- It's So Easy Stripe Rite Black - for detailing
- Claire's White striping Polish - for the shirt
- Chine Glaze First Mate - for the tie
The 11th Doctor on my middle finger:
- Icing Skinny Dipping Beauty - for the jacket
- It's So Easy Stripe Rite Black - for detailing and pants
- Claire's White striping Polish - for the shirt
- Sally Hansen Celeb City - for the buttons
- Ink Nail Art Dark Red - for the bowtie
A Dalek on my ring finger:
- Revlon Vincent Van Gold - for the base
- It's So Easy Stripe Rite Black - for detailing
- Claire's Gem Wheel - yellow rhinestones - for the "Dalek bumps"
- Claire's Gem Wheel - silver rhinestones - for the eye stalk.
A Cyberman on my pinky:
- Claire's Celeb City - for the base
- It's So Easy Stripe Rite Black - for detailing
Also ... I just finished watching the special. So. Good.
Labels:
black,
blue,
brown,
burgundy,
China Glaze,
Claire's,
feature nail,
gems,
gold,
Icing,
It's So Easy,
metallic,
Revlon,
Sally Hansen,
silver,
Sinful Colors,
white
Monday, November 18, 2013
Flakie Comic Nails
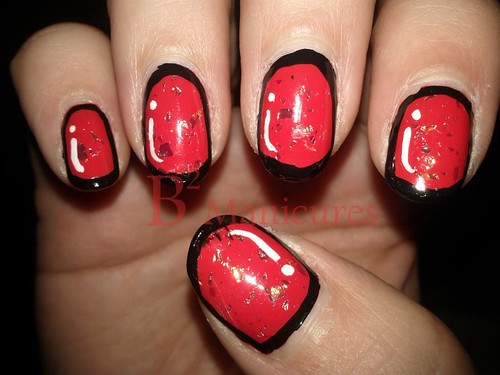
I wanted to do comic book nails again, but I thought it might be fun to add some flakies to it.
Two coats Color Club Love Links - this is a red with just a hint of orange. I picked this one up a while back on clearance from a local nail supply place. I was going to buy OPI's My Paprika Is Hotter Than Yours, but spotted this bottle for $1.99. It looked pretty close in the bottle, except the OPI had a slight shimmer to it. I was mostly looking for the shade, and I love a bargain, so Color Club won.
I added a coat of Icing By Claire's Rave Royalty - I really wish this one photographed better. The flakies are an iridescent orange-gold.
I applied a black outline using It's So Easy black striping polish and the "shine" detail using Claire's white striping polish. I think I could have left out the white, but it still looks good.
Two coats Color Club Love Links - this is a red with just a hint of orange. I picked this one up a while back on clearance from a local nail supply place. I was going to buy OPI's My Paprika Is Hotter Than Yours, but spotted this bottle for $1.99. It looked pretty close in the bottle, except the OPI had a slight shimmer to it. I was mostly looking for the shade, and I love a bargain, so Color Club won.
I added a coat of Icing By Claire's Rave Royalty - I really wish this one photographed better. The flakies are an iridescent orange-gold.
I applied a black outline using It's So Easy black striping polish and the "shine" detail using Claire's white striping polish. I think I could have left out the white, but it still looks good.
Labels:
black,
Claire's,
Color Club,
flakie,
Icing,
It's So Easy,
red,
white
Monday, November 11, 2013
Mint Apple Caviar
I'm a big fan of deals on nail stuff - so, when Urban Planet started carrying nail stuff at 3 for $5, I had to look.
I mentioned the Nabi 3D Rainbow Effect polishes in my last post, I'm hoping to pick up the rest of them, because I really like them.
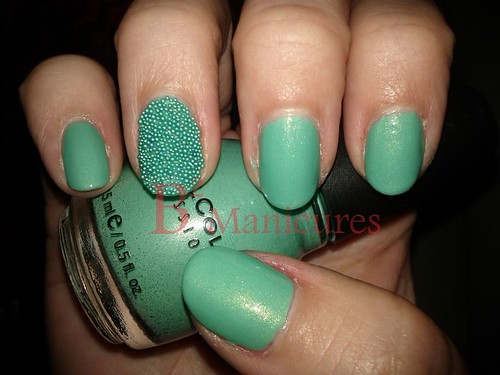
They also have other bits and pieces - I've wanted to try the beaded "caviar" manicure for a while, and they had a pack of 5 little vials of different coloured beads.
The blue-green beads were an almost perfect match for Sinful Colors Mint Apple.
Each finger got two coats of Mint Apple.
I used a normal topcoat on my ring finger and then poured the beads over top into a little dish,
I used my normal quick dry topcoat on the rest.
It looks kind of cute, but the beads did start to pop off the next day, so this kind of a one-night manicure.
I mentioned the Nabi 3D Rainbow Effect polishes in my last post, I'm hoping to pick up the rest of them, because I really like them.
They also have other bits and pieces - I've wanted to try the beaded "caviar" manicure for a while, and they had a pack of 5 little vials of different coloured beads.
The blue-green beads were an almost perfect match for Sinful Colors Mint Apple.
Each finger got two coats of Mint Apple.
I used a normal topcoat on my ring finger and then poured the beads over top into a little dish,
I used my normal quick dry topcoat on the rest.
It looks kind of cute, but the beads did start to pop off the next day, so this kind of a one-night manicure.
Wednesday, November 6, 2013
Catching up Part 2
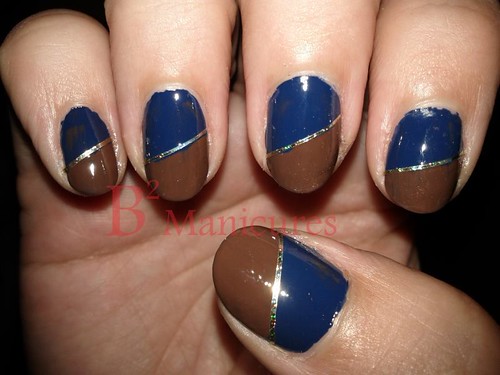
I was looking up autumn nail trends, and found a couple of shades that I thought would really work well together: navy blue and chocolate brown. I also wanted to use the striping tape that I bought at a local Asian night market, so I thought diagonal two-tone would be fun.
I used China Glaze First Mate for the blue and Revlon Chocolate Truffle for the brown. The striping tape is a holographic gold.
My topcoat picked up the brown and deposited it on the blue on a couple of nails ... oops.
Oxblood was another autumn trend, so I thought it would be a good choice.
I used two coats of Sally Hansen Burgundy Child for most of the fingers, and two coats of Nabi 3D Rainbow Effect in Tawny
The Nabi polishes aren't bad - I get them 3 for $5 at Urban Planet, and while not super strong, they do have a slight linear holo effect going on.
I needed some orange for Thanksgiving / Halloween:
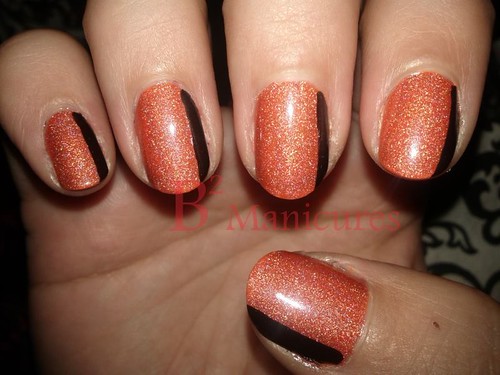
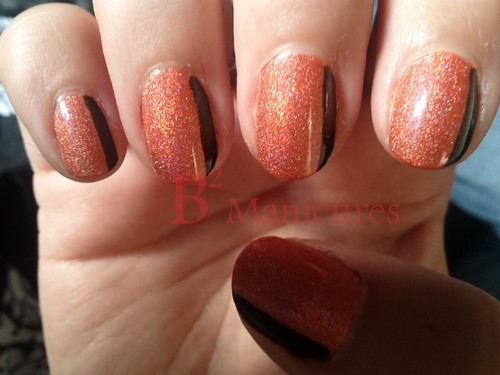
3 coats Nabi 3D Rainbow Effect in Bronze (mine is mislabeled as "Brone" - hah!) and I did a "sideways Fench" with Avon Golden Twilight - a black with gold glitter.
Fuzzy image for the slight holo effect:
Finally, for Halloween, I decided to do something different on every finger.
- Thumb was a vampire mouth: Color Club Red de Rio for the base, Claire's black detail polish in the middle and detailing at the top, Claire's white detail polish for teeth and a "shine" on the bottom lip.
- Index finger was a jack-o-lantern: Revlon Nude Beige base, NYC Pumpkin for the pumpkin, Claire's black detail polish for the face and outline, I used a no-name green glitter detail polish for the stem.
- Middle finger was one of my favourites - a ghost. I used Sinful Colors Snow Me White, added Wet n Wild glow in the dark topcoat, then created the outline with Claire's black detail polish - I used a dotting tool for the bottom and the eyes.
- Ring finger was my other favourite - a blob of slime. Revlon Nude Beige for the base, Nabi 3D Rainbow Effect in Green for the slime, Claire's black detail polish for the outline.
- Pinky was done by applying a layer of Sinful Colors Snow Me White, a layer of Sally Hansen Sun Kissed and finally a layer of Sally Hansen Mellow Yellow. I outlined it all with Claire's black detail polish to create the triangular Candy Corn shape.
phew!
I used China Glaze First Mate for the blue and Revlon Chocolate Truffle for the brown. The striping tape is a holographic gold.
My topcoat picked up the brown and deposited it on the blue on a couple of nails ... oops.
Oxblood was another autumn trend, so I thought it would be a good choice.
I used two coats of Sally Hansen Burgundy Child for most of the fingers, and two coats of Nabi 3D Rainbow Effect in Tawny
The Nabi polishes aren't bad - I get them 3 for $5 at Urban Planet, and while not super strong, they do have a slight linear holo effect going on.
I needed some orange for Thanksgiving / Halloween:
3 coats Nabi 3D Rainbow Effect in Bronze (mine is mislabeled as "Brone" - hah!) and I did a "sideways Fench" with Avon Golden Twilight - a black with gold glitter.
Fuzzy image for the slight holo effect:
Finally, for Halloween, I decided to do something different on every finger.
- Thumb was a vampire mouth: Color Club Red de Rio for the base, Claire's black detail polish in the middle and detailing at the top, Claire's white detail polish for teeth and a "shine" on the bottom lip.
- Index finger was a jack-o-lantern: Revlon Nude Beige base, NYC Pumpkin for the pumpkin, Claire's black detail polish for the face and outline, I used a no-name green glitter detail polish for the stem.
- Middle finger was one of my favourites - a ghost. I used Sinful Colors Snow Me White, added Wet n Wild glow in the dark topcoat, then created the outline with Claire's black detail polish - I used a dotting tool for the bottom and the eyes.
- Ring finger was my other favourite - a blob of slime. Revlon Nude Beige for the base, Nabi 3D Rainbow Effect in Green for the slime, Claire's black detail polish for the outline.
- Pinky was done by applying a layer of Sinful Colors Snow Me White, a layer of Sally Hansen Sun Kissed and finally a layer of Sally Hansen Mellow Yellow. I outlined it all with Claire's black detail polish to create the triangular Candy Corn shape.
phew!
Friday, August 30, 2013
Catching Up
Since I got back from the UK, work has been crazy, with terrible shifts, and when I'm not at work, we've been going out a lot.
It's just been a crazy summer, and I haven't been able to keep up here.
I've still been doing my nails though - so here's what I've got:
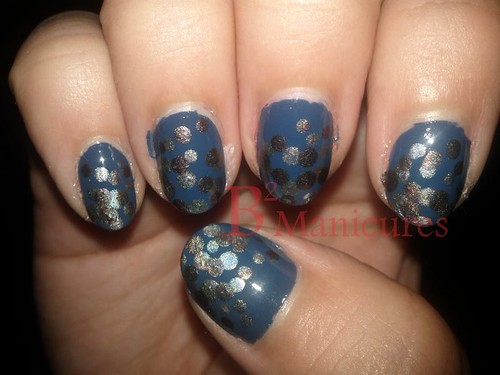
Polka Dots:
This was a base of Sinful Colors Rain Storm
Dots were done using two sizes of a dotting tool and China Glaze Holographic in Cosmic Dust and Galactic Grey.
This was for the Reddit challenge "Polka Dots"
Neon:
I started with Sinful Colors Snow Me White to give the neon a solid base.
Three coats of Ardene Neon Yellow - this is a highlighter yellow. It's ridiculously bright.
Over top of that, I dabbed Icing By Claire's Shredded. This one is pretty neat, it's not really what I'd call flakies, but it's shredded black glitter. The clear base has a slight blue tint to it, so it unfortunately changed the yellow a bit. I tried to do a sort of gradient with it, and reversed the gradient on my ring finger.
This was for the Reddit challenge "Neon"
Secret Periwinkle:
oops! this was my 100th manicure on here.
um ... I'll try to remember to do something fancy for 150?
I bought China Glaze Secret Periwinkle, because periwinkle is an awesome colour. Not quite blue, a hint of lilac. This is a really nice polish - 2 coats. I will be wearing this often.
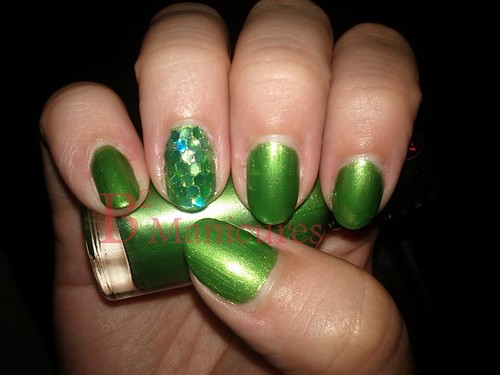
Green Mermaid:
Three coats of Wet n Wild Fast Dry Sage in the City.
For my ring finger, I poured out a small amount of hexagonal glitter on to a piece of tin foil, and added a dab of topcoat next to it (not fast dry!). I applied a coat of the same topcoat to my ring finger, and then used a toothpick dipped in the topcoat to pick up the glitter and applied it one-by-one to my nail. This didn't take as long as you'd think - but I don't know that I'd have the patience to do my whole hand. I had to apply two coats of a thick topcoat to seal it off, and even then, there was some texture.
This was also a giant pain in the butt to take off, even with the foil method.
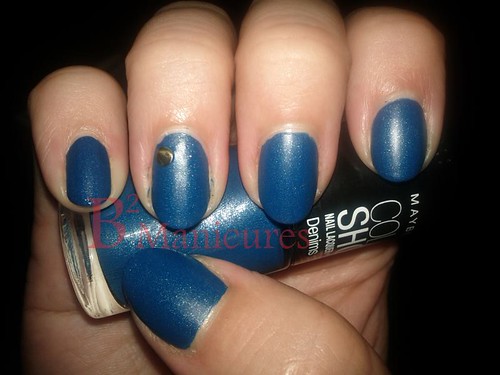
Jeans:
My friend bought me a bottle of Maybelline Color Show Denim Dash - it's a pretty blue polish with fine silver glitter that dries matte. I used two coats for this manicure.
I added a stud to my ring finger, to look like the button, or the rivets on jeans.
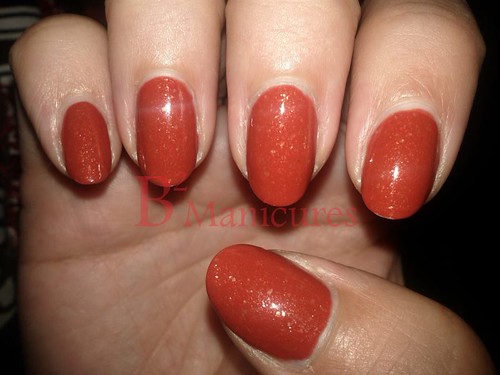
Gorgeous Bling Bling:
In honour of the cooler weather these last few days, and inspired by the pumpkin body lotion I just bought from Bath and Body works, I decided I needed to use an autumn shade on my nails.
This colour is essence Gorgeous Bling Bling (what a terrible name!), but it really is a gorgeous colour. Rusty orange with teeny tiny orange-gold flakies.
phew. OK, I'll try to keep up with this a little better.
It's just been a crazy summer, and I haven't been able to keep up here.
I've still been doing my nails though - so here's what I've got:
Polka Dots:
This was a base of Sinful Colors Rain Storm
Dots were done using two sizes of a dotting tool and China Glaze Holographic in Cosmic Dust and Galactic Grey.
This was for the Reddit challenge "Polka Dots"
Neon:
I started with Sinful Colors Snow Me White to give the neon a solid base.
Three coats of Ardene Neon Yellow - this is a highlighter yellow. It's ridiculously bright.
Over top of that, I dabbed Icing By Claire's Shredded. This one is pretty neat, it's not really what I'd call flakies, but it's shredded black glitter. The clear base has a slight blue tint to it, so it unfortunately changed the yellow a bit. I tried to do a sort of gradient with it, and reversed the gradient on my ring finger.
This was for the Reddit challenge "Neon"
Secret Periwinkle:
oops! this was my 100th manicure on here.
um ... I'll try to remember to do something fancy for 150?
I bought China Glaze Secret Periwinkle, because periwinkle is an awesome colour. Not quite blue, a hint of lilac. This is a really nice polish - 2 coats. I will be wearing this often.
Green Mermaid:
Three coats of Wet n Wild Fast Dry Sage in the City.
For my ring finger, I poured out a small amount of hexagonal glitter on to a piece of tin foil, and added a dab of topcoat next to it (not fast dry!). I applied a coat of the same topcoat to my ring finger, and then used a toothpick dipped in the topcoat to pick up the glitter and applied it one-by-one to my nail. This didn't take as long as you'd think - but I don't know that I'd have the patience to do my whole hand. I had to apply two coats of a thick topcoat to seal it off, and even then, there was some texture.
This was also a giant pain in the butt to take off, even with the foil method.
Jeans:
My friend bought me a bottle of Maybelline Color Show Denim Dash - it's a pretty blue polish with fine silver glitter that dries matte. I used two coats for this manicure.
I added a stud to my ring finger, to look like the button, or the rivets on jeans.
Gorgeous Bling Bling:
In honour of the cooler weather these last few days, and inspired by the pumpkin body lotion I just bought from Bath and Body works, I decided I needed to use an autumn shade on my nails.
This colour is essence Gorgeous Bling Bling (what a terrible name!), but it really is a gorgeous colour. Rusty orange with teeny tiny orange-gold flakies.
phew. OK, I'll try to keep up with this a little better.
Labels:
Ardene,
black,
blue,
China Glaze,
essence,
feature nail,
flakie,
Glitter,
gradient,
green,
holo,
Icing,
Maybelline,
neon,
orange,
purple,
Sinful Colors,
studs,
Wet n Wild,
yellow
Monday, July 22, 2013
Reddit Challenge - Green
I'm sure I could have done something fancy with this one, but I wanted to do a plain colour.
It is a light metallic silvery green. I used three coats to get coverage that I was satisfied with (you could probably stop at 2, but in case you hadn't noticed by now, I like my polish very opaque). each coat dried very quickly.
In other news ... I got back from two weeks in England yesterday!
No, I didn't make the last two posts from there - I did the manicures before I left and scheduled the posts.
Later this week, I'll show you my nails for the trip along with some highlights from the trip!
This is Rimmel Rags to Riches.
A friend gave this one to me a couple of months ago, and when I saw there was a green challenge coming up, I knew I wanted to use this one.It is a light metallic silvery green. I used three coats to get coverage that I was satisfied with (you could probably stop at 2, but in case you hadn't noticed by now, I like my polish very opaque). each coat dried very quickly.
In other news ... I got back from two weeks in England yesterday!
No, I didn't make the last two posts from there - I did the manicures before I left and scheduled the posts.
Later this week, I'll show you my nails for the trip along with some highlights from the trip!
Monday, July 15, 2013
Reddit Challenge - Delicate Print
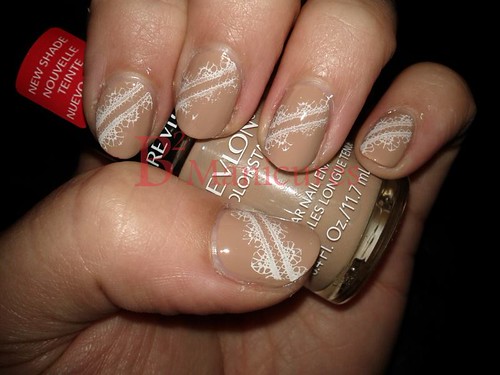
I knew this one called for stamping, so I went through all my stamp plates, and finally settled on something lacy.
I started off with three coats of Revlon Nude Beige, then stamped on the diagonal lace pattern from Bundle Monster plate BM-323 using Sinful Colors Snow Me White
Pretty, simple and delicate!
I started off with three coats of Revlon Nude Beige, then stamped on the diagonal lace pattern from Bundle Monster plate BM-323 using Sinful Colors Snow Me White
Pretty, simple and delicate!
Thursday, July 11, 2013
Guest Post - Shilak
My Friend Miss Manpreet sent me a photo and writeup about a Shilak manicure she had done, and I wanted to share!
"So, I was in Prince George for my high school reunion and decided to treat myself with a Shilak. I went with a shimmery black. They applied 1 coat of Gel base and then 2 coats of the black. She then used the thin design brush from Sally Hansen in white and silver to create a design on my ring finger. She drew an eye shape with the white and then added on some silver dots. Loved them!"
Monday, July 8, 2013
Reddit Challenge - Inspired by Colour
I have really liked blue lately, so I figured, why not choose blue for this challenge?
I started with two coats of Ardene's Elektronika - a very pretty dark blue creme that I've used quite a bit. I used this as a base for the star of this manicure ...
Color Club Total Mystery - a sheer blue base with a blue-purple shimmer. I'd put this as a subtle duochrome - you can see it in the bottle, and you can sometimes see it on your fingers. I like it a lot, it's really pretty. I wish I could get better photos of it.
I started with two coats of Ardene's Elektronika - a very pretty dark blue creme that I've used quite a bit. I used this as a base for the star of this manicure ...
Color Club Total Mystery - a sheer blue base with a blue-purple shimmer. I'd put this as a subtle duochrome - you can see it in the bottle, and you can sometimes see it on your fingers. I like it a lot, it's really pretty. I wish I could get better photos of it.
Subscribe to:
Posts (Atom)