Sunday, April 29, 2012

52 Weeks of Nails - Cartoon Mani

I had a tough time figuring out what to do for this one.
Cartoon Manicure

Do I go for My Neighbour Totoro? Teenage Mutant Ninja Turtles? She-Ra? Monster High? Hello Kitty?

I decided to go with one that I actually haven't seen much of, but is quite popular: My Little Pony: Friendship is Magic.
I also decided to go outside my comfort zone with my colour choices.

I picked Fluttershy.

Sorry for the very blurry photo of my nails - it was really hard to get a picture. My house is VERY dark (you'll see my carpet in the photo at the bottom of this post), and the polish is SO pale. eep!

009 Cartoon Manicure 52

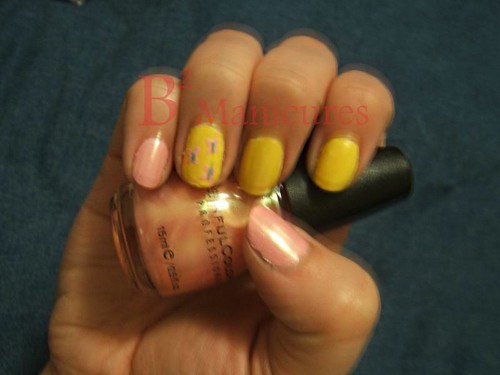
For the pink, I chose Sally Hansen Insta-Dri in Pink Blink - 2 coats on each of my thumbs and pinkies. It's a little bright, but it works. I'm not sure how I feel about the Insta-Dri brushes. The stem is flat, so you can't really get the polish off of it, and it flows down onto the brush. The upside of that is you don't need to re-dip the brush. The downside is you sometimes end up with a bit too much polish. The photo dulled down the pink quite a bit - it's surprisingly bright.

I did one coat of an off-white Zoya polish I bought several years ago, just so I could get a bit of a base going for the yellow.
Then I did 2 thick coats of Sally Hansen Xtreme Wear in Mellow Yellow. I'm not a big fan of the yellow polish, it's quite hard to get a nice opaque coating.

I topped all my nails off with Sinful Colors in You Just Wait - a sheer pink with a yellow shine. I figured it would tie everything together nicely. I like this one a lot - in some light, there is a yellow shine and in other light it's pink. It's perfect for this manicure.

And, of course, if you're doing a my little pony, you need the "cutie mark," so on my ring fingers, I added 3 pink butterflies - using the Pink Blink again. I used the head of one of those little gold safety pins to do little pink 'X' marks. Then I painted their bodies using Claire's White detail polish, topped off with N.Y.C.  Turquoise Seas (using the pin to dab it on). It's an old colour, but it's nice - sheer shimmery turquoise.

There isn't a lot of contrast in the photo, but in real life, the butterflies are more visible.

Definitely not colours I'd normally wear on their own ... let alone together, but it's very spring-y and cute.


My birthday is on Tuesday, so I went out for dinner with some friends tonight.
One of them spoiled me with a lovely manicure related gift:

birthday 2012

Claire's detail polish in white, hot pink and neon green.
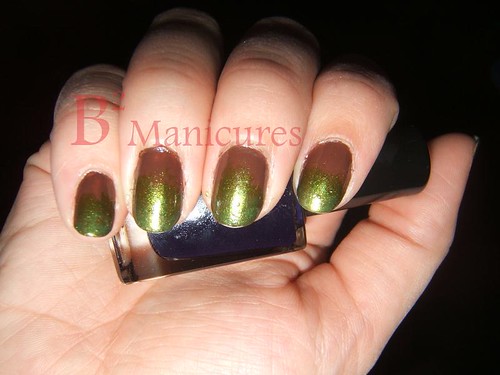
China Glaze Magnetix in You Move Me plus the magnet :)
OPI Cuckoo For This Color
and an OPI Avoplex set with Cuticle Oil to Go, Exfoliating Cuticle Treatment and High Intensity Hand and Nail Cream

I feel so loved ^_^

The detail brushes will really help out for next week's theme - Floral Manicure!

Monday, April 23, 2012

52 Weeks of Nails - "Earth Appreciation"

52-week challenge  - this week is "Earth Appreciation"

I was a bit stumped on this one. I didn't want to draw little recycling symbols on my fingers, so I figured "earthy" would be good enough.


  008 Earth Appreciation 52

 I used 2 coats of Revlon's Chocolate Truffle. I love this brown - it's so pretty.

 After that, I brushed on a layer of Sinful Colors' Show Me The Way. That wasn't quite doing it for me, so I tore up a cosmetic sponge, dabbed some polish on that and went over the green with another layer. Much better.

Finally, I lightly dabbing the tips with Wet n Wild Jade, just to give a slightly different shine. (it's a bright green with a gold shine to it).

Topped it off with OPI topcoat.

I like the combination of the creamy brown and the glittery / shimmery greens. The sponging added a fun texture to it - I'll definitely try it again.

Next week is "Cartoon Mani" ... I am plotting.

Friday, April 13, 2012

Dot Gradient

I was looking around at other nail polish blogs, and found a 'dot gradient' manicure. I decided to give it a shot. I went with the tutorial on PixelsPolish.

I don't have a dotting tool (well, actually I do, it's called a sculpting tool, and that's what I use it for). Anyways - I'm all about not having to buy extra junk to do funky manicures, so I did this all freehand.
I also didn't bother to use tape, because I didn't want to have that many layers of polish, I just painted each half on its own.

I went with black and gold and did the gradient on my thumbs. The rest of my nails are just plain black with super skinny gold french tips.

Please pardon the smudge on my middle finger - I put the topcoat on right before I left for the day (I was going to be sitting in the car doing nothing for a few hours, I figured it would be safe), but I smushed the polish with my purse.

It was hard to get a photo of this - not used to taking photos where you can see my thumb nail.

007 Dot Gradient

I started with the gold polish - unfortunately, I don't have a big bottle, so I just used my Icing By Claire's gold detail polish. I painted a diagonal line down my nail and filled in one side - two coats.

I moved on to the black - OPI Black Onyx - filling in the other half of my thumb and painting all my other nails. Two coats.

Going back to the black, this time using my Claire's black detail polish. I started in on the dots. First ones were right up against the centre line - I did 4. Then I moved out and did 3 smaller ones, and finally 2 smaller ones outside those.
Then I went back in with the gold - painting dots on the now mostly dry black. It was actually at this point that I decided my other nails were to plain, so I did the gold tips.

Next week, I'm starting part way through a 52 week nail challenge. I'm using the one from I'm Simply Complex
I only just noticed that this week's is "Dotticure" ... I guess I'm starting it this week - hah!
Anyways, I'll see this one through to the end, and find a new one in January. If I can't find a new one, I will just start at the beginning of this one.

Next week's theme is "Earth Appreciation" hm.

Nouveau Vintage Stripe

I did this one on Sunday night, so it's coming up on a week old - it's wearing pretty well. My other hand started to chip a bit (on my problem nail).
It was a bit hard to photograph this one - natural light was too dark, and with the flash, you get that shiny spot. I stuck with the flash photo, because it shows the colour best.

006 Nouveau Vintage with Gold

This is Color Club's Nouveau Vintage from their Back to Boho collection. 2 coats. I'm loving everything I've tried from this collection. I have to put stickers on the bottles with the names though - I keep having to look them up :p

Topped it off with Gosh Matte topcoat. This is the only matte topcoat I have tried and I would call it more of a "satin" finish than a true matte. It flattens everything out, but there is a dull shine. Not sure if other matte topcoats are like this or not, but this was the only one I could find locally.

Once that was all dry, I took Icing by Claire's nail art polish in gold, and did two stripes on each nail.

Tuesday, April 3, 2012

copper newspaper mani

I had to take a bit of a break after some nail trauma, and after this manicure, I'll probably take a bit of a break again, just because so many of my nails are peeling :(

I was going to a convention, and was planning on wearing a steampunk themed outfit. I figured I should have nails that went with it.
I did the manicure on Friday, but took the photo this morning. It's held up really well.

005 copper newspaper

This time, I used Revlon's quick dry basecoat.

For most of my nails, I used OPI "Skull and Glossbones" - 2 coats.
Once that was very thoroughly dry, I moved on to the newspaper - one nail at a time.
Dip the nail in rubbing alcohol, then lightly press a piece of newspaper on it. A lot of tutorials say to hold it there for 30 seconds, but I got a decent print after only a couple of seconds. To be fair, I was using the paper that was delivered that morning - maybe if it's older, you need to hold it longer. I also found the wetter the nail was (with the alcohol), the better the newsprint transferred.
I messed one nail up because I hadn't let the polish dry long enough, so I had to redo it.
Once it was all done, I topped it off with GOSH matte topcoat.

My ring finger I just did with Wet n Wild Craze in "Rustic", topped off with OPI's topcoat.

fun!