Tuesday, February 26, 2013

Reddit Challenge - Jelly Sandwich

This week's challenge is a "Jelly Sandwich"
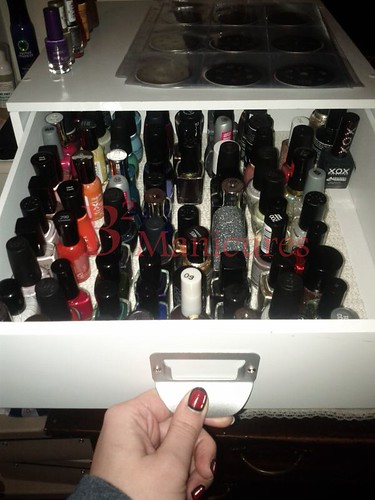
Sounds kind of silly, but here is how it works:
You take a sheer pigmented nail polish that goes on without streaks (a "jelly polish"), apply one or two coats. Then you apply a coat of glitter. Apply another coat of the jelly polish over top.

I wanted mine to be a bit more opaque, so I used a creme polish as my first layer. I guess it's not a true jelly sandwich, but it's still pretty.

068 Jelly Sandwich 52R

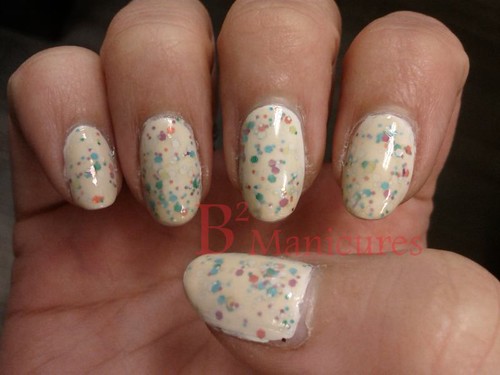
I started with two coats of my Zoya White.
For the glitter layer, I chose Claire's Scented polish in Sugar Cookie. This is from their holiday set, which I managed to get on sale. Sugar Cookie is a clear yellow tinted polish (not thick enough to be a jelly, but the yellow is strong enough to tint whatever you use as an under coat - I was not expecting this, but it turned out nicely!) with multi-coloured glitter in two different sizes.
For the top jelly layer, I used two coats of Sally Hansen Polar Bare, which is a sheer white. This toned down the yellow, making this manicure a nice creamy colour.
The scent from the glitter coat still comes through the two layers of the jelly polish and the topcoat! I couldn't imagine how strong it would be if I just left it on it's own. It smells a little sweet, which is nice.

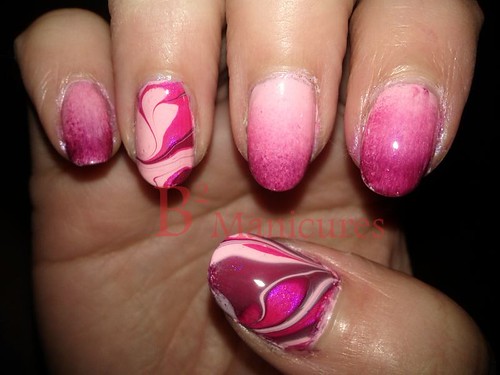
Everyone has been comparing this to Easter eggs - I might have to do it again when easter rolls around, but instead, use pastel creme polishes as the base!

Saturday, February 23, 2013

Turquoise Nails

After seeing them over on Reddit, and after a tutorial was posted, I knew I had to try.

Mine didn't turn out the way I wanted, but they're still really pretty.

067 Turquoise

I started with one coat of Fascino Blue as a base, then went over it with a coat of Sinful Colors Mint Apple.

Once that was all dry, I dripped some Sally Hansen Golden-I into water, as if I was about to do a water marble, but instead of adding more colours and swirling, I spritzed it a couple of times with rubbing alcohol, then I dipped my nail in.

After I finished the gold on all my nails, I did the same thing with Avon Licorice.
Here's where I made a mistake - I used two drops of black, but you only need one.

I highly recommend taping your fingers if you're going to do this, because I didn't, and I had to do a LOT of cleanup.

I'll definitely be doing this one again - I really like it.

Tuesday, February 19, 2013

Reddit Challenge - Shooting Star French

The challenge theme this week was French manicure.
After I did my Valentine's French manicure, I thought it would be fun to use little jewels to do shooting stars as a French mani.

066a French Shooting Star 52R

066b French Shooting Star 52R

Just like last week, I used Essence Sweet as Candy on my whole nail, then painted French tips on with Avon Licorice.

I used my It's So Easy Stripe Rite turquoise polish to draw some lines on top of the black.

Then I added some little gems - I had purple and red stars, so I went with purple.

Finished it off with a thick coat of topcoat to keep the gems on.

I think it's super cute - I want to find a red or purple striper polish and do it again.
The gems started popping off my left hand the next day, and lasted about 3 days before I picked them all off.

I've got an attempt at a tutorial I saw to show you later in the week!
Next week's challenge is a "Jelly Sandwich"

Thursday, February 14, 2013

Black and Pink French

I tried the purple/green duochrome comparison, but my house is too dark and the skies were too gray to take photos, so I'll save it for another day when I can take photos in sunlight.

So, I present to you instead, a pink and black French manicure with bonus hearts!

065 French Heart

I started with a base of Essence Sweet as Candy on my whole nail. As you can see, it's super sheer. It's a pale pink in the bottle, but just gives a slight milky look to the nail. Perfect for a French mani.

I did the tips of my nails with Avon Licorice and let that dry.

Then I used my Claire's detail polish in hot pink to add the stripes and hearts. The fun thing about this detail polish is that it not only has a super skinny brush for doing lines, it also has a 'pen' tip. It's a little metal tube that the polish flows through when you squeeze the bottle.
To do the hearts, I squeezed one drop on my nail and let it dry, then I squeezed another drop out right next to that one and dragged the polish down and back up to create the bottom of the heart.

I think If I were to do it again, I'd do the heart in two layers - a black layer and then the pink layer over top, so it stands out more.

Next week's challenge is actually also a French manicure - I've got something in mind and I hope it works!

Monday, February 11, 2013

Reddit Challenge - Pink Two Ways

This week's Reddit Challenge is Pink - in honour of Valentine's day.

Someone at work wanted to see a water marble, and I wanted to try another sponge gradient, so I decided to do both at once.

064 Pink 52R

I started with two coats of Sally Hansen Pink Blink

For the sponge gradient, I painted Pink Blink, Sally Hansen HD Digital, and Avon Vintage Vamp in slightly overlapping stripes onto one side of a makeup sponge, then I dabbed it on my nails.
As usual, it worked way better on one nail (middle finger) than the others ... which is why I haven't posted any yet ... but it still looks not bad!

For the Water Marble, I used the same colours. At first, I tried to do a heart shape, but my bullseye wasn't small enough to pull it off, so I just swirled it all around.


I've used Pink Blink for several manicures - it's a baby pink creme.
Sally Hansen HD Digital is a bright pink, slightly sheer shimmery thing - I loved the way it swirled in the water marble. There was a lot of depth to this shade.
Avon Vintage Vamp is from their old line of polish - it's a burgundy creme that leans toward purple.

The two techniques didn't quite go together as well as I had hoped, but it's still cute and very, very pink.

Friday, February 8, 2013

Royal Blue + Heavenly + Matte

I found a bottle of Revlon Heavenly a while back and was trying to figure what to wear it over.
I saw this review on Pretty Girl Science blog and loved the way it looked, so I wanted to try and recreate it.

Without flash, so you can see the sparkles:
063 Blue Heaven a

With flash, so you can see the blue base:
063 Blue Heaven b


I started with 2 coats of A.Co (Ardene's) Elektronica - a lovely royal blue creme. It was a bit streaky on the first coat, and I had to be careful of creating bare patches, but the second coat solved all this and it was perfect.

Then I topped it off with Revlon's Heavenly. This is a really pretty iridescent chunky glitter polish in a slightly milky base. It is a dupe of a Deborah Lipmann's Stairway to Heaven nail polish.
You get two shapes, and they're two different iridescent colours. The hex glitter is an orange-green shift and the square glitter is a turquoise-blue shift.
Super pretty.

When that was all dry, I slapped on a matte topcoat.

I'll definitely do this one again. I don't care if glitter is a pain in the butt to remove.

I've got another post coming up on Monday - another challenge theme.

Monday, February 4, 2013

Reddit Challenge - Inspired by Nature

I've wanted to do a butterfly manicure for a while, and I figured the 'Inspired by Nature' theme was the perfect opportunity.
I first saw it when a friend sent me a pretty purple and blue version; the tutorial I found was an orange gradient.
I decided to go with the orange version after receiving the Sally Hansen HD polishes for Christmas. Super shimmery and pretty, and sheer enough that I can do an easy gradient.

Unfortunately, I couldn't get a good photo right after I finished the manicure, and I got some pretty bad tip-wear (I think it's actually chipping) by the next day.

062 Butterfly 52R

I started with a coat of NYC Pumpkin to get a base colour on there.

I haven't had much success with sponge gradients in the past, so I went with a brushed on one. I think I'll try a sponge gradient next time.

I went over Pumpkin with Sally Hansen HD in Lite (bright shimmery yellow) from the cuticle to about 2/3 the way down my nail.

I coated the whole nail with a thin coat of Sally Hansen HD in Three D - it's more of a red toned orange.

I went back over the top 1/3 of my nail with Lite again to finish off the gradient.

Once that was satisfactorily dry, I used my It's So Easy Stripe Rite detail polish in Black to do the detail lines, and my Claire's detail polish in White to add the spots at the tips.
ALWAYS wait for your detail to dry before putting on topcoat - or else you get smudgy dots, like I did.

It's a very summery manicure - adds a bit of brightness to all this cold rainy weather!

Friday, February 1, 2013

Comic Nails and my Storage Unit

Ok, so this manicure has been sweeping across Reddit - and I love the way it looks - so I wanted to give it a shot. It's called a "Comic Book Manicure"
It's a take on the outline manicure, but the colours and a bit of detail makes it look like it's right out of a comic book or cartoon:

061 Comic Book

I started with 3 coats of Essence Flame Fatale - this is a lovely classic red. I think I like red nail polish now.
It goes on really evenly even with only one coat, but I had a pretty visible nail line. 3 coats made it opaque.

For the outline, I used my new It's So Easy Stripe Rite polish in Black. Flows nicely, opaque in one coat and dries kind of matte. Because detail brushes are so thin, I did a couple of stripes side-by-side to get the thickness that I wanted.

Then, the final detail to make it look like it's out of a comic book - add a 'shine' with white nail polish!
I used my Claire's white detail polish, and essentially did an exclamation point near the edge of the red on each nail.

Love it! I've been getting so many comments and compliments!


And now, my new nail polish storage!

If you go wayyyy back, you'll see I kept my nail polish in a box.
Well ... after many gifts and some purchases, my collection grew - the box was mostly full and I had a second smaller box for my minis (aaand, I used the lid of that box for my topcoat/basecoat/remover/etc). Everything else was kind of strewn all over my vanity.

Since I bought the Melmer, I have all my nail junk organized and pretty. My other makeup however ...

Here is the unit - there is a bit of a smudge on the top drawer, not sure where it came from:

01 Melmer


Top Drawer is my full-size nail polish. It is primarily organized by colour, then I have sheers, glitters and other effects. I originally had this on the bottom, but it squeaked horribly whenever I opened it, so I switched it to the top. The empty spots are polishes I've set aside for a couple of possible future manicures (you can see some of them on top):

02 Top Drawer

Middle drawer is my basecoats and topcoats, smaller polishes, scented polishes, and my detail polishes - this one is mostly sorted by brand:

03 Middle Drawer

And bottom drawer is all my other junk - nail files, cuticle goo, lotions, jewels and fimo bits, stamping supplies, removal supplies, and nail stickers - the straw is for my splatter manicures and I use the little plastic cup for water marbling!:

04 Bottom Drawer

I keep my stamping plates on top in baseball card holders - it's a bit of a pain, but they work for now:

05 Stamps